Hey internet, in this blog, we are going to create a developer/designer portfolio using react-portfolio-template which is a portfolio template based on Next.js & TailwindCSS.
If you don't want to read this article you can watch a youtube video about it
so, let's get started
Setting Up Locally
- To get started with the template, at first we need to get it up and running locally on our machine, so to do that you can clone this repo.
git clone https://github.com/chetanverma16/react-portfolio-template - once you have cloned this repo then we need to install some dependencies.
npm install - After installing the dependencies we can run the next.js server.
npm run dev
after following these steps we will have something like this running on localhost:3000 -
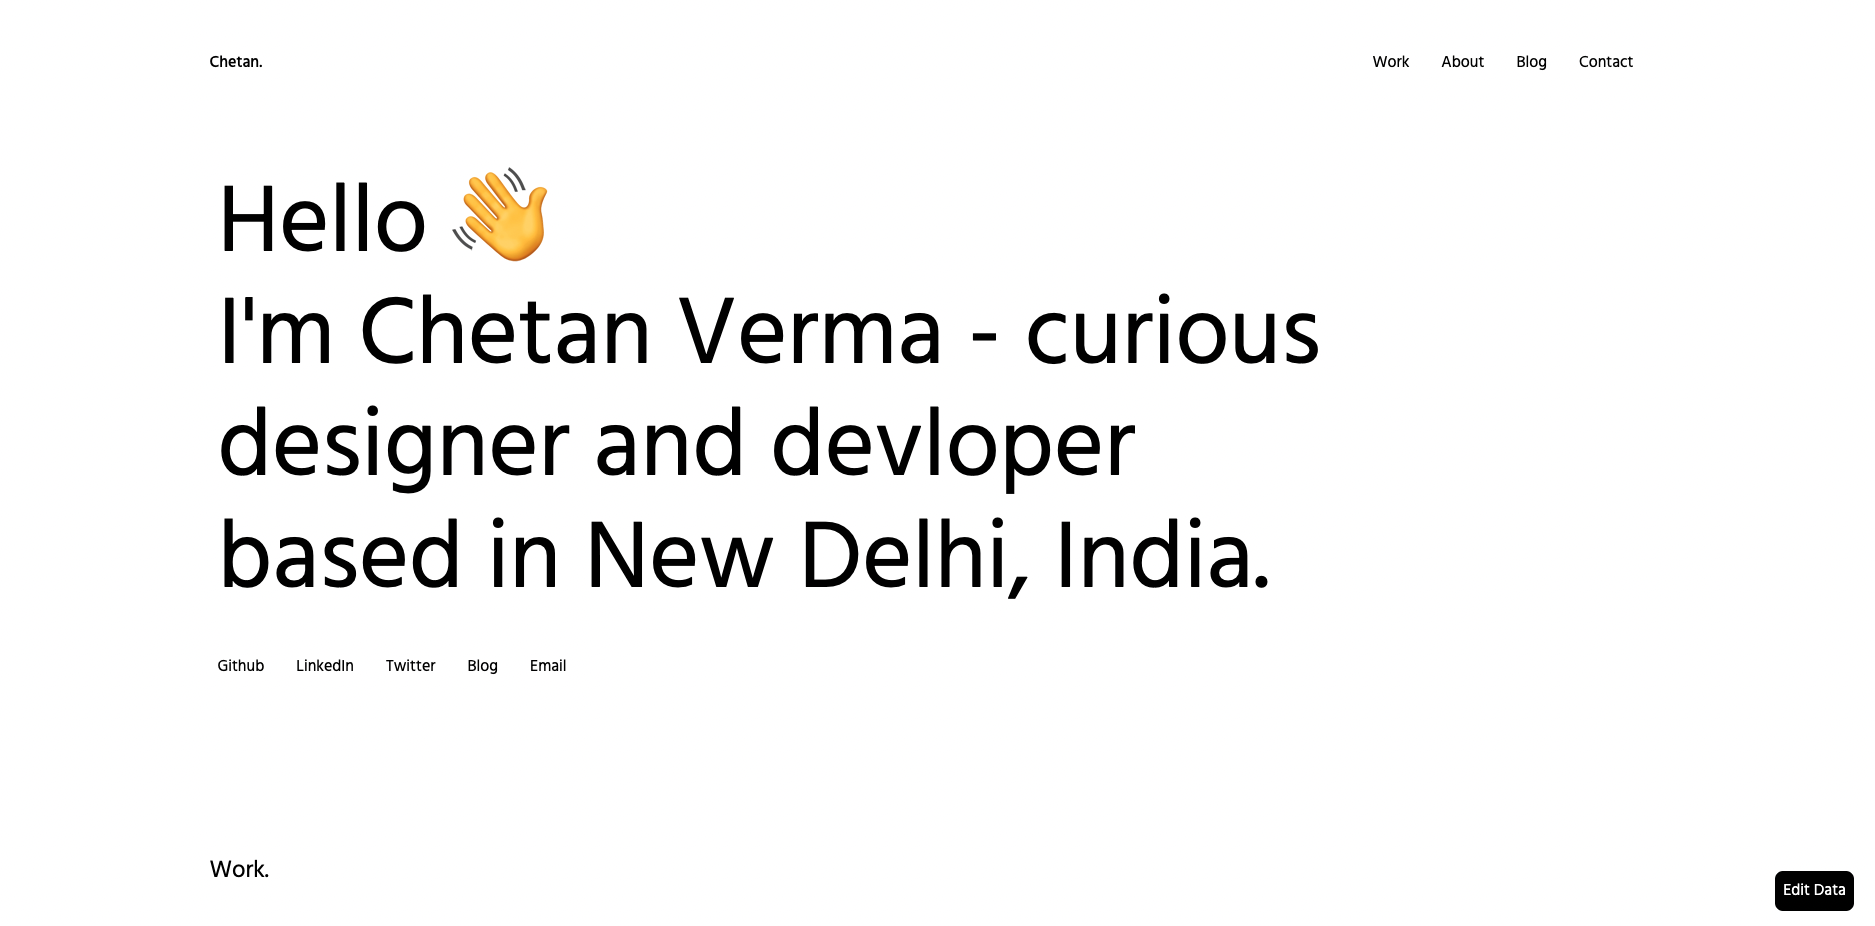
now we are good to go with the next steps.
Editing Some Data
So, now we have something running on the screen let's edit the data and make this portfolio custom to our needs.
now, we just need to click on the button Edit Data which you can see on the bottom right corner of the home page or you can directly go to localhost:3000/edit
you will see a GUI something like this -
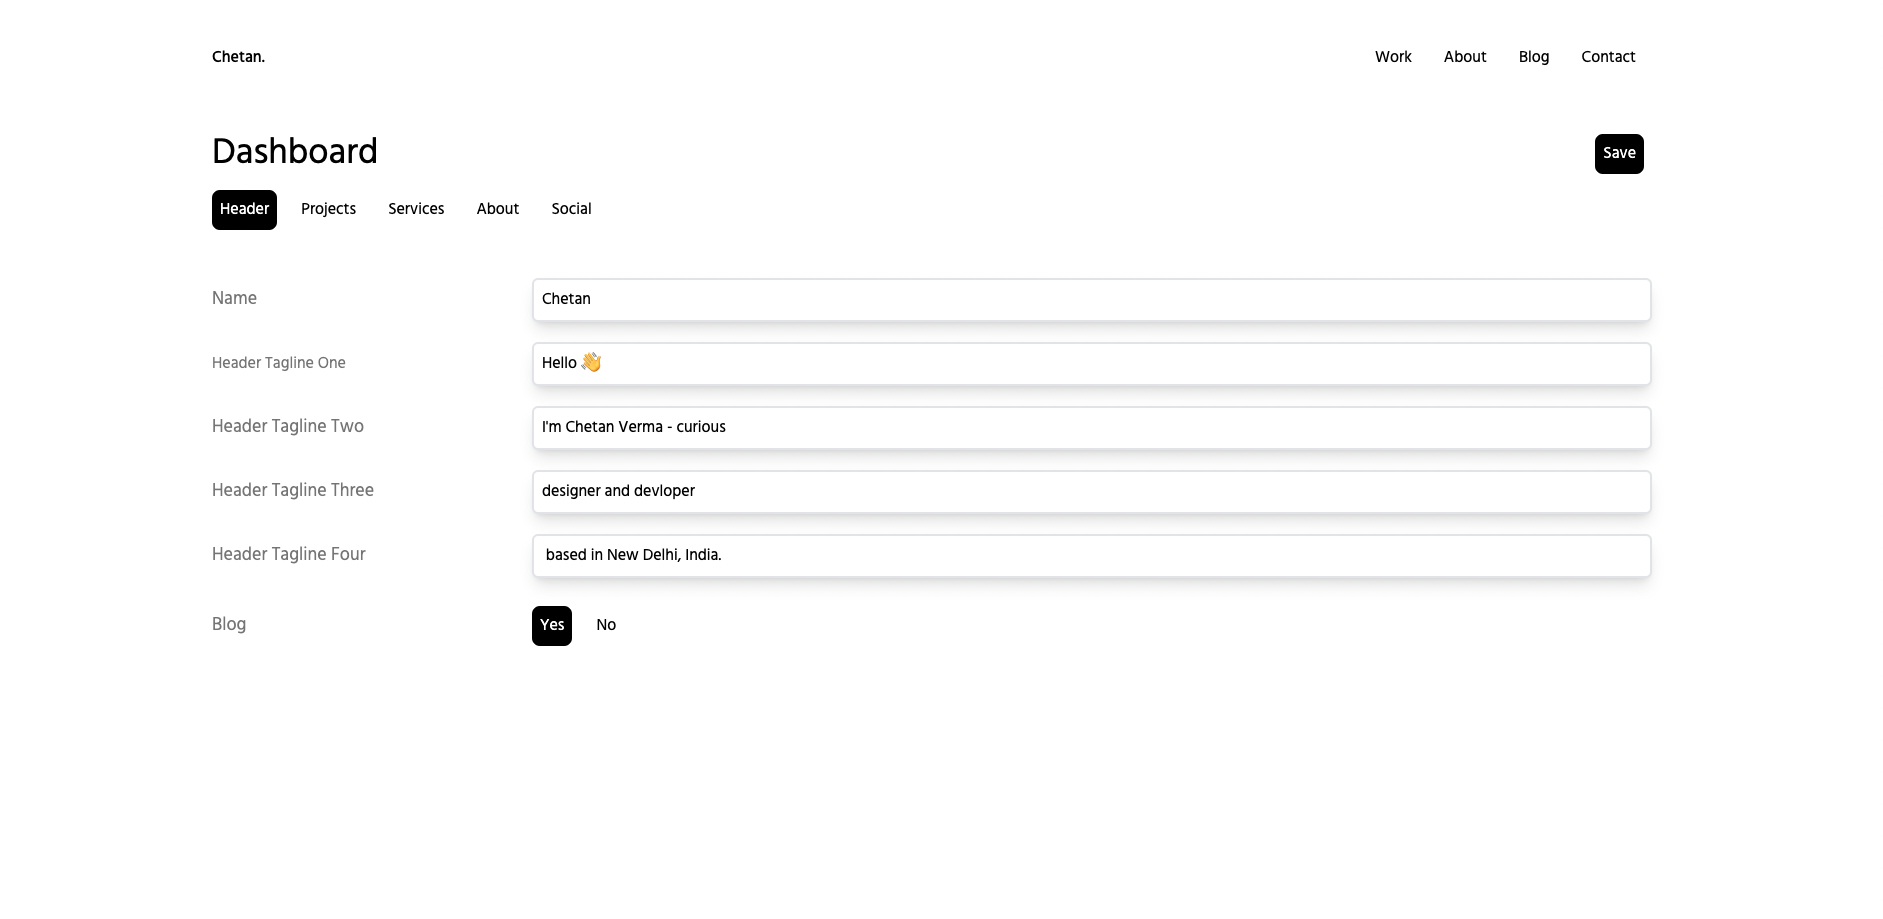
Where you will see a bunch of fields that we can edit and there are multiple tabs for different sections such as -
- Header - this tab is for editing the header of the website
- Project- edit the project section.
- Services - edit the services section.
- About - edit the about section.
- Social - edit the socials or personal links.
so, once you have edited the portfolio according to your needs you can now go and click on the save button.
and once this is saved you can go back to the home page (localhost:3000) you will be able to see all the changes you have made, and now we have our custom portfolio made in just 5 minutes.
Editing Blog Data
you might have noticed there is a blog page on our portfolio that can be hidden through the localhost:3000/edit page, if you don't want to have a blog on your portfolio.
but if you do, you might want to know how to edit the blogs. so, let's do that you might be able to see three demo blogs on the portfolio. to edit those blogs we need to go to our code and go to the _posts folder. you will find the demo blogs written in markdown you can go into any of those blogs and start editing those.
to create a new blog, we just need to create a new markdown blog and add some markdown variables for adding the structure to the blog.
here are the variables that we need to add-
---
date: '2022-06-10T18:30:00.000Z'
title: Ok Let's See How this blog will turn out
tagline: This is a Tagline If you want to add.
preview: >-
  Lorem Ipsum is simply dummy text of the printing and typesetting industry.
  Lorem Ipsum has been the industry's standard dummy text ever since the 1500s,
  when an unknown printer took a galley of type and scrambled it to make a type
  specimen book.
image: >-
  https://images.unsplash.com/photo-1656188505561-19f1a1b6cda8?ixlib=rb-1.2.1&ixid=MnwxMjA3fDB8MHxwaG90by1wYWdlfHx8fGVufDB8fHx8&auto=format&fit=crop&w=1632&q=80
keywords: "Keyword One, Keyword Two"
author:
  authorname: Author One
  authorimage: >-
    https://images.unsplash.com/photo-1599566150163-29194dcaad36?ixlib=rb-1.2.1&ixid=MnwxMjA3fDB8MHxwaG90by1wYWdlfHx8fGVufDB8fHx8&auto=format&fit=crop&w=687&q=80
readingtime: 3
---
// Content Goes Here
so once you have added the variables and added the content for your blog you can save the file and try reloading localhost:3000 you will be able to see your new blog under localhost:3000/blog.
Deploying
Once we are done with our portfolio it's time to deploy. there are many ways to deploy this portfolio.
In this blog, we are going to do it through Netlify
the first thing you have to do is to go to netlify.com and log in or create an account.
- once you are logged in you can create a new site by clicking on
add new siteand then import an existing project. - after that click the git provider you are using to import your portfolio template. - now select the repo you want to deploy - and click on deploy site.
Netlify will do it's magic and will deploy your site 🚀.
Awesome now we have our portfolio up and running
Portfolio Template
Thank you for reading this far.
If you enjoyed this article, give it a ❤️ so others can find it too.
For more frequent tips, stay in touch on Twitter
Contact Me: